Sawdust Flocking
Flocking is the general term of adding fibers to a surface or an object. In our world, that is typically a tree, the ground or the base of something like a gaming figure. While this can be purchased, it is typically ground foam and the colors are stark. The other issue is cost, availability and shipping, which can be as much or more than the cost of the product. After going through this, I personally was surprised how easy and how well this came out.
In researching this, sawdust was already being used in the early 1940s, but honestly, have not been able to find instructions. While enamel paint was prevalent, I doubt this would work and presume they used tempera. As usual, I tested multiple approaches and in the process identified a few problems that need to be avoided.
Understanding Colors:
The most important thing to understand is that the color you see in the drying tray is not necessarily the color you will end up with. Remember, you are gluing this onto a surface of another color and if a tree, there is light that will shine through the tree. Your overhead lighting, both the tone and lumens can alter it the color as well.
If you are making trees, you will need no less than three colors of green and found the darker colors gave better results. If you want to get scientific, you can get the exact mix, but this is approximate. The most important thing to manage is ‘black’ and go slowly with it:
Forest Green: Blue (4 parts), Yellow (3 parts), Brown (2 parts), and Black (1 part)
Dark Green: Yellow (4 parts), Blue (3 parts), and Black (2 parts)
Olive Green: Blue (1 part), Yellow (1 part), Brown (1 part), and Black (1 part)
General color changes:
Add yellow to make it brighter
Add red or orange to dull the color
Add blue to make it dark
Add white or black to change the shade
Sawdust Prepartion Directions:
Tools:
** Wire Mesh Strainer (least cost source is a ‘dollar’ store)
** 1 gallon mixing pail
** 3 cookie sheets (pick these up at garage sales or don’t let your wife know you are using hers)
Preparation: sift sawdust and dispose of larger residual sawdust. I found using different woods adds color variation; ensure there is no painted wood in the mixture
Paint: both paint and stain were tested and had similar results. You want a thin consistency like deck stain. In addition to water to thin, add a small amount of dish detergent which breaks the tensile strength of the paint.
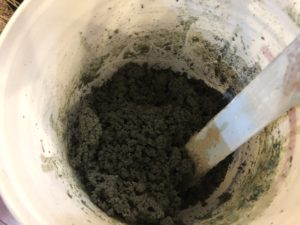
Mixing: the mix is about 1 part paint to to 4 parts sawdust. Mix the sawdust slowly into the paint and stir using a paint stirrer. Add enough paint until it becomes aerated (see picture).
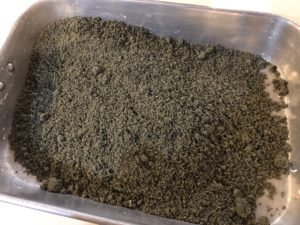
Drying: spread mixture on cookie sheet and turn twice a day. I gave the sawdust two days to dry.
Final Preparation: sift colored sawdust and dispose of clumps or large particles.
Cleanup: bucket of water to wash your hands and tools.


