Sedum Trees:
The use of this plant for trees has been done for several decades, but with the advice of a couple people and my own experimentation, these are repeatable and sustainable steps.
Plant Preparation:
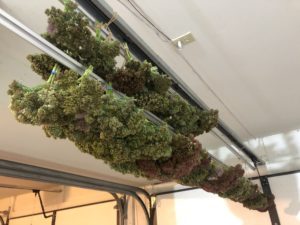
Firstly, I have to thank many in my town for letting me raid their gardens at the end of the season. Before drying, I inspected for bugs and trimmed to a standard length of about 6″, though you will most likely cut apart further after the drying process. My mother used to do dried flower arrangements and she showed me by hanging them upside down, that the flowers pedals won’t fall off. She was right. I bundled in groups of 10 with a rubber band and then made a ornament-like hook out of paper clips. After about two weeks, they were dry and I softly packed them into banana boxes for safe storage.
TREE DIRECTIONS:
Tools:
** Paint and glue mixing and spinning buckets (use 1 quart takeout container)
Preparation: cut sedum to desired ‘head’ size, but leave the stem which is your handle. Inspect for broken parts and remove any remaining leaves which come off easily.
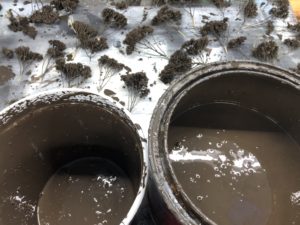
Paint: both acrylic paint* and stain were tested and had similar results. In this picture we used ‘exterior’ paint which has resins for flexibility (aka temperature changes) and noticed this stiffened the dry stems significantly. You want a thin consistency like deck stain. In addition to water to thin, add dish detergent which breaks the tensile strength of the paint and rubbing alcohol (or window cleaner) to add the flow of the paint. Recipe: paint (4 parts); water (4 parts); rubbing alcohol (1 part); and one large drop of dish detergent. Mix with a paint stirrer. Fill the 1 quart container half way with paint.
Painting Tree Armatures: dip sedum plant in paint mixture and lightly shakeoff excess paint in same container. Use second empty container and spin the armature ‘slowly’ between your forefinger and thumb. Make sure you hold this at least half way into the container or you will see polkadots everywhere! If the paint looks thick, add more water.
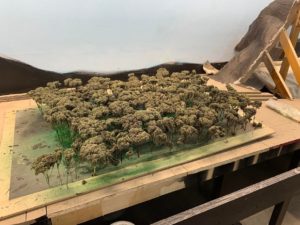
Drying: put holes in either cardboard or foam core and stand tree armature upright to dry.
[Dip right, spin left. Pour excess paint back into dip bucket]
Glue: the recipe for this is the same as the paint: white glue (4 parts); water (4 parts); rubbing alcohol (1 part); and one large drop of dish detergent. Mix with a paint stirrer. Fill the 1 quart container half way with paint.
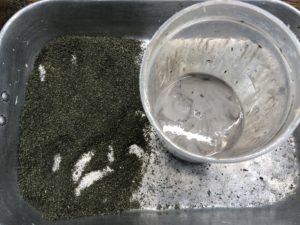
Flocking Tree Armatures: dip dried armature in glue mixture, lightly shakeoff excess and spin ‘slowly’ between your forefinger and thumb. If the glue looks thick, add more water. Holding the armature, sprinkle the flocking on all sides. Do NOT press the armature into flocking as it will make it look clumpy and close the open spaces between. Inspect for open or wet areas and add more flocking accordingly.
Removing Excess. we all have a tendency to tap things on the container, but it can break the stems. Tap with your fore finger.
Drying: utilize same drying board.
Cleanup: bucket of water to wash your hands and tools.
[Armatures dipped spun in container, flocking sprinkled on all sides.]
UNDERSTANDING COLOR:
[Flocked trees drying on drying board]
Color is one of personal preference, but there are some rules of thumbs. Trees will be darker than ground cover and if trying to show depth, they will be even darker with a hue of blue. In the Flocking Tutorial I gave three recipes for forest, dark and olive green. As noted, your lighting will impact this color and strongly recommend making a tree and putting it under the light. A modeling mentor Steve Sherrill, whose work is well known in the hobby, explained the need for the three colors and layering. I discovered for creating a forest, if you start with the darkest color and make a dozen or two trees, that if you add a handful of the next color, it changes the hue of the trees. Continue this process and it will give you the slight variations that you see in trees, versus just having three succinct colors.
If you like to follow along our entire build, visit Fitchburg Railroad On30 on Facebook.
* Steve Sherrill had excellent results using spray paint, but in the spirit of Modeling 1940s Style, I used free acrylic paint that I acquired from a moving sale. I found the acrylic to be neater and of course didn’t have the fumes, which is an issue modeling in the Winter the months.


